
.
We've been going at this whole Rubbish thing for well over 13 months at this point - I think it's time we make a concerted effort to move this relationship forward in a meaningful way.
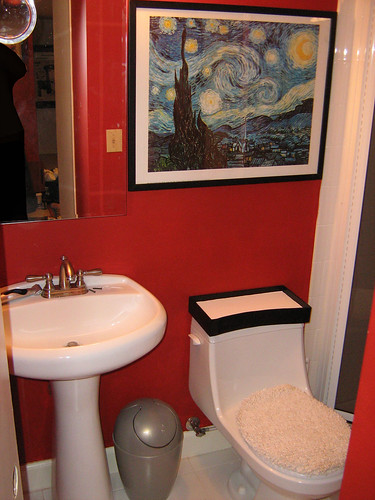
With that in mind, I present to you a photograph of my bathroom:
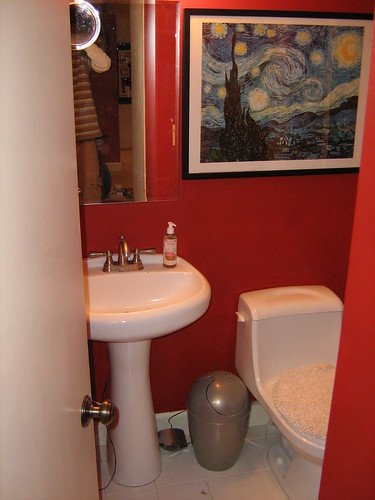
Admittedly, this basement-based 4x6 cubicle of a poop repository isn't too impressive in terms of stature, and yes the pipes freeze up anytime the temperature drops below 20 degrees outside because there's absolutely no insulation surrounding the plumbing, but you know what? It gets the job done. It's a good, honest, working man's bathroom, which is more than slightly ironic considering that I've been out of a job since December and my overall levels of goodness and honesty would surely be debated by anyone who went to high school with me.
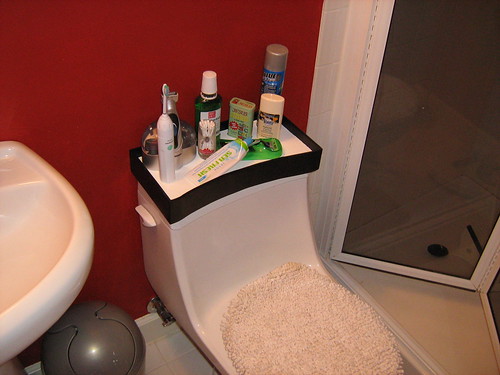
Regardless, you'll be pleased to know that while this bathroom falls well short of adequacy in terms of size and warmth, it makes up for these shortcomings by offering almost no storage space whatsoever. There's a small medicine cabinet on the wall, but the only open shelf space comes in the form of the two 2" x 2" soap platforms on the back end of the sink. That's barely enough room for a toothbrush and toothpaste, let alone my totally not horrible smelling Axe body spray and the 35 separate Nivea For Men products I use on a daily basis, so I decided to build a little shelf space on top of my toilet to handle the overflow.
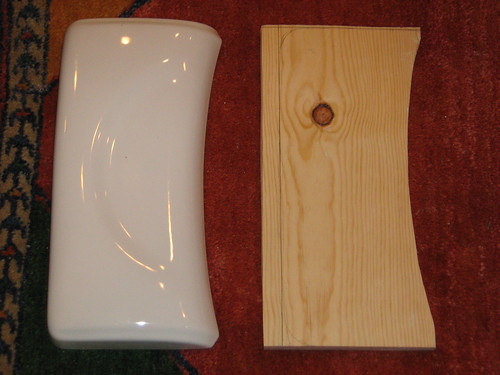
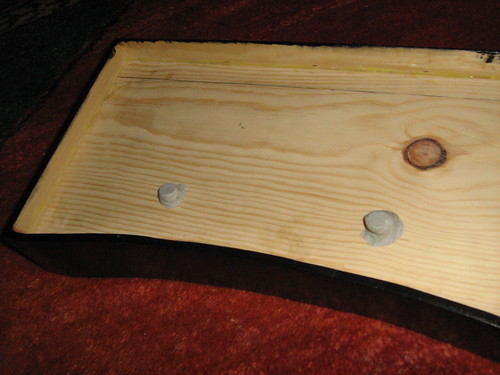
I started by cutting out a piece of wood to match the same size as the TOP of the toilet lid (this is an important, caps-lock-worthy distinction because the lid was tapered from the top to the bottom - if I'd traced around the bottom of the lid my shelf would have ended up being way too big).
After that I took some thin slats of wood that I picked up from the Home Despot and glued/nailed them around the three straight edged (hardcore) sides of my lid-shaped piece, like-a so:
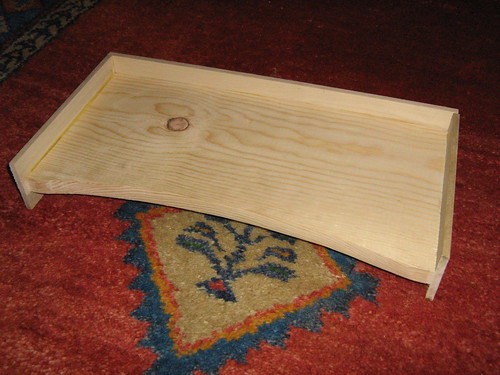
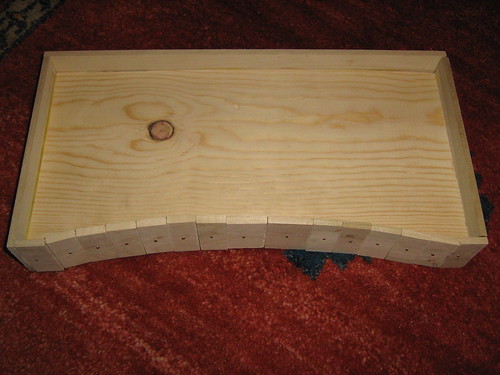
For those of you that struggle with basic logic, I centered the slats on the main piece of wood so that there would be both a large rim around the top of the shelf to keep my toothbrush from falling into the toilet AND a large rim around the bottom of the shelf to keep it from moving from side to side while sitting on top of the lid.
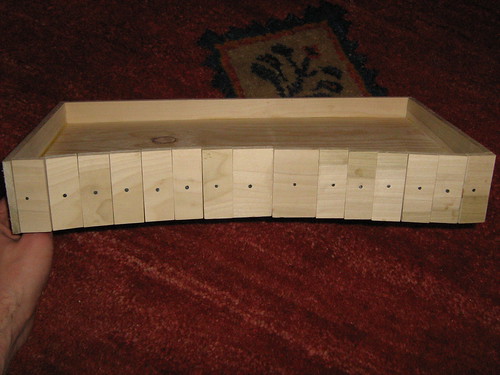
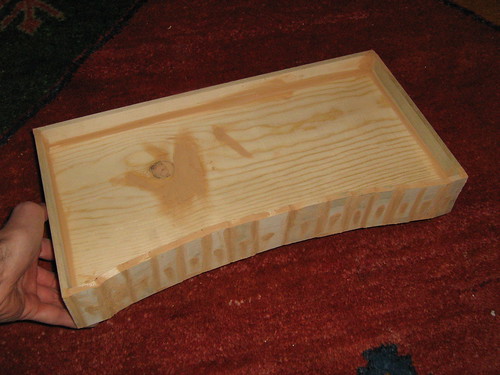
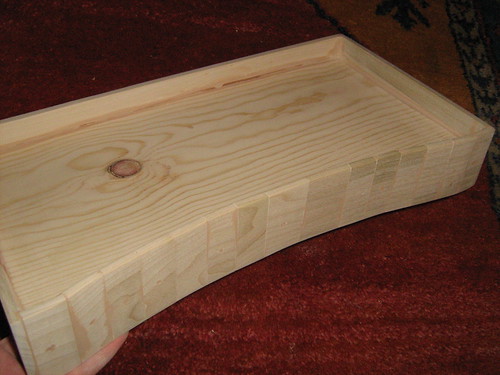
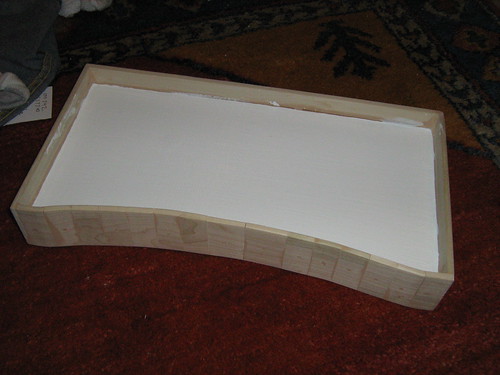
Now, the front edge was going to be a bit more tricky on account of its general curved-ness. I toyed around with a couple of ideas as to how I might be able to get a single piece of wood to bend like that (all of which almost certainly wouldn't have worked), but ended up cutting 15 individual 1" slats of wood to accomplish the job instead. Once they were laid end-to-end and nailed into place, my shelf looked something like this:
Yessir.
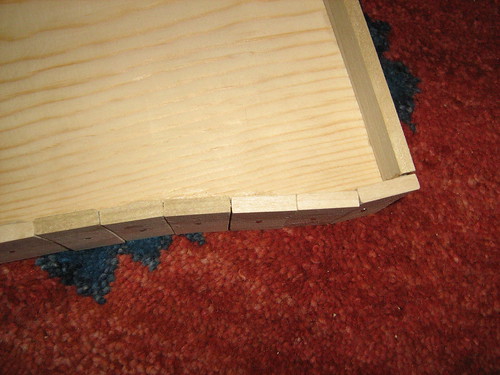
The only problem with this solution was that, as you'll see below, it left a lot of fairly large cracks in the external facade of the shelf:
To remedy this problem I first countersunk all of my nails with a nail punch, then proceeded to slather the everloving living shit out of this thing with wood filler:
Stop staring at my hand. And no, I don't have arthritis.
Following a spirited bout of power sanding, we're left with something that's starting to look not only halfway decent, but most of the way decent. That's pretty good, for those of you that weren't already aware.
Next I applied a couple coats of white paint to the base of the shelf:
Then I applied some black paint around the outer rim, at which point I promptly forgot to take a picture. Oh well.
You may have noticed this in the first picture of my bathroom (though I have to question your emotional stability if you really gave the shot that much attention), but the top of my toilet has this goofy decorative scoop taken out of the middle of it which could really cause some significant stability problems for my shelf, so I put some wax paper on top of the toilet lid then smushed a couple globs of Waterweld epoxy putty onto the bottom of the shelf before putting the shelf in the position I wanted it to be in for the long haul. Once the epoxy putty dried I was left with 2 custom-fit support trusses for my project:
Mmm... epoxy teats.
Without further ado, the final product:
And look, it works! HOORAY!!!
Now, truth be told this project wasn't completely finished at this point, as I'd yet to waterproof the thing with polyurethane (kind of an important step for something that sits within 6 inches of a sink that's used by a sloppy, sloppy man). I only took the pictures at this step because when you put polyurethane over a white paint it dries to look kind of yellow and gross, like someone peed on a tile floor and didn't bother to wipe it up (not that I'd know anything about that). So yeah, as much as I hate to break it to you this way, the shelf as it exists now does not look nearly as good as the shelf in the picture you're looking at.
Had I a larger budget I would have bought a decent piece of wood for the main slab of this shelf then stained it to a natural color instead of painting it white, but alas I was trying to get this all done for under $5 so I had to go digging through the cull bin for my lumber and all I came up with was this piece of scarred and pre-treated pine. Had I attempted to stain it I can assure you that it would have come out looking FAR worse than the "did you pee into this thing?" inducing piece of furniture I currently have in my possession.
As it always does, that mythical phrase "oh well" rules the day.
Oh well indeed.
Thursday, March 12, 2009
COME MARVEL AT MY STAGGERING ERGONOMIC ACUMEN
![]()
Subscribe to:
Post Comments (Atom)


4 comments:
Really? It's been here all day, and not even Artie Mangilord could comment on it?
A fine shelf young McHanslaw, a fine shelf indeed. and good use of the small pieces. I'm sure it will serve you for many years to come. While you live in your parent's basement. Playing XBox 360. With a wireless controller, so you don't trip on your way to your mini fridge to get some Funyuns and Mountain Dew. And we all know it's Mountain Dew, because your broke jobless ass can't afford a Monster or a SoBe. Except on the rare occasions when Artie comes over and you guys go on a 2-day raiding binge.
Naked and scratching your ass while playing Halo and Fallout 3 is no way to go through life, son.
But that's a nice shelf.
Long time reader, lackluster poster here.
Congratulations on the joblessness. Hope the mortgage is paid off. Or at least the site hosting for a year, amirite?
How many hours did it take to complete this project from conception to final product?
Answers in brief:
1. It probably took about 4 hours or so, though I bet I could have gotten it done in an hour and a half if I wasn't using a hand saw to make all my cuts.
2. I believe Dr. Mangilord was on vacation initially, Jouda.
3. The site hosting is free, Anonymous Johnson. All praise the majesty of google inc. And thanks for the backhanded compliment as well.
On a somewhat related note, I have found a job. This job has me working from 1 until 9 on Thursday through Monday, which has cut down on my "free to write a bunch of bullshit on a website" time considerably. Couple this with the fact that a bunch of my relatives just came in from Wisconsin (leaving my family's house smelling like a middle ground between a bingo parlor and a Great Clips, though of course it should be mentioned that they are brilliantly entertaining people) and we've got an equation that results in my not getting posts done right now.
Hopefully I'll get one done tonight or tomorrow. Hopefully. No promises except for this one:
My pecs are fucking huge.
Post a Comment