
.

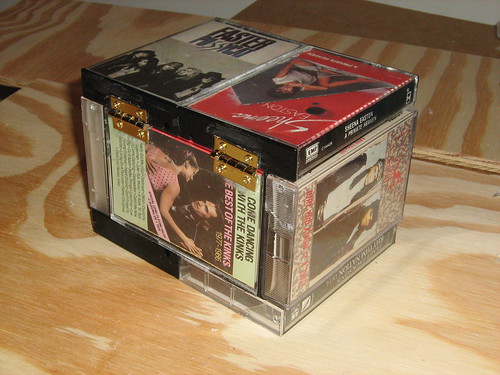
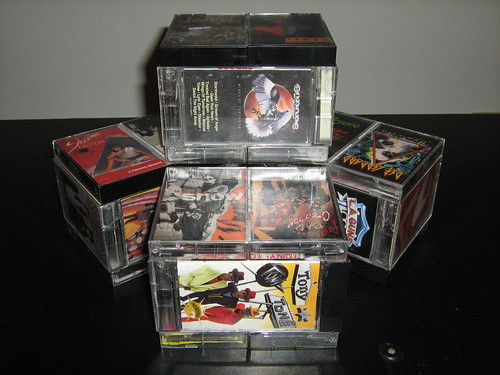
Only one conclusion could possibly be drawn here: This functional cube of cassettes rocks harder than the Hindenburg disaster.
Necessary Materials:
- 8 or 9 audio cassettes (depending on how you want to construct it) with solid cases - $2 to $5
- Goop glue or other strong plastic adhesive - $3.50
- Small hinges (optional) - $3.50
- Well ventilated room - Depends on the neighborhood
- Either a boatload of moxy OR large breasts (preferably both) - Priceless
TIME TO COMPLETE: Less than 30 minutes
Introduction:
Cassettes, cassettes, cassettes... why must we all own so many goddamn cassettes??? I mean, this technology hasn't been relevant for at least 15 years, and yet every single time I step into a new acquaintance's house I find myself instantly bombarded by an army of cassette tapes! On their bookshelves, under their beds, floating in the water wells behind their toilets... I swear, these damn cassettes are everywhere!!!
I lied repeatedly in that previous paragraph. In all honesty, I'm pretty sure that I'm the only person under the age of 45 in the western United States that still has a collection of cassettes lying around his house, but that doesn't change the fact that there are millions of them in some form of circulation in this country. But why do something with them, why not just throw them away or donate them to charity? Well for starters, you're a cheap bastard if you're going to give your antiquated collection of crappy pop music to charity and call it a "donation". Shame on you. Secondly, the plastic that was used to make cassette cases is the same nasty material that is currently used to make CD jewel cases - it is unrecyclable, and is about as biodegradable as a sack of polystyrene packing pellets, so it's not going anywhere anytime soon (as such, we might as well find some sort of use for it). Finally, and perhaps most importantly, a lot of these old 80's pop cassettes look really cool, so they've got a lot of visual appeal built right into them.
Also, with Valentine's Day coming up and all, I thought I'd provide the general male public with a great and cheap gift idea for their ladyfriends and concubines... well, it's only a great gift idea if you make the assumption that everyone in the general male public is dating some sort of spindly broad with thick framed glasses whose most commonly used pantaloons are acid washed green and held up by a retrofitted General Motors seatbelt apparatus from the late 1970's. That's a fair assumption to make, right?
Instructions:
1. If you don't have any old cassettes lying around, head down to your nearest thrift store. They will have hundreds of them, I can guarantee you of this, and at most places they'll cost somewhere between 25 and 75 cents apiece. Pick out 9 cassettes (or 8 if you want to have a hinged box) that you like the look of, and check all of their cases to make sure they're sturdy, unmelted, and crack free. Purchase these things, then drive or walk home. The store manager most likely won't let you do this project in his store.
2. We don't want these cassette cases to be randomly flying open and spewing magnetic tape all over the place, so before you get to actually making the box structure you need to open all of your cassette cases and run a thin line of glue down the long edge of the case's door (the thin clear part that the album artwork lies flat on), then close the cassettes back up and let the glue dry for however long your glue takes to dry. Note: If you want, you can keep the actual audio cassettes and just make the box out of the cases, but I found that the cassettes add a nice weight and feel to the project once it's finished.
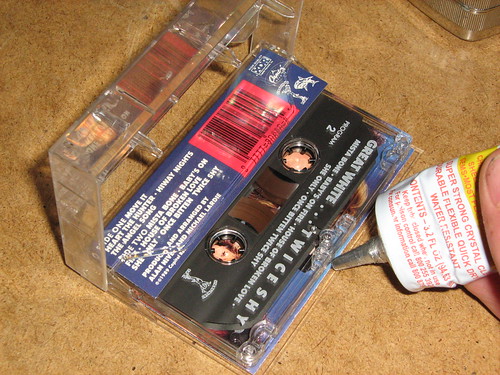
Tragically, this copy of "Once Bitten, Twice Shy" shall never be heard from again... rest in peace, old friend
3. Pick out the 2 cassettes that you want to have as the lid on your box (these will be the most visible, so they should probably be the 2 that you like the most). You can either put them side by side facing the same way, or you can flip one over so that the sides of the cassettes with the bands' names and album titles printed on them will be showing on both sides of the lid. For my glam rock box thing, I took the latter route. Once you have them the way you want them, glue them together using Goop glue or another plastic glue (I tested a few before doing this project, and Goop was the easiest to manage and had the strongest hold, but there are a lot of plastic glues out there that will at least do an adequate job). Wipe away any excess glue that may present itself.
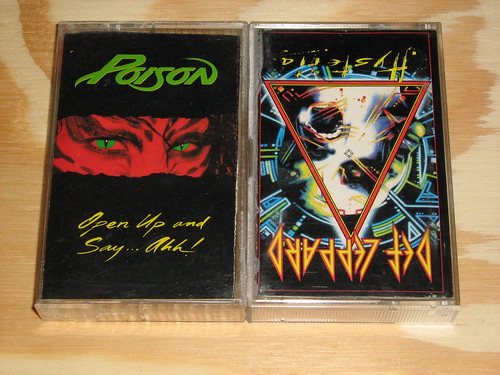
More like "Open up and say... ugh"
4. (Note: Skip this step and the next one if you're doing a hinged box) Flip your newly glued lid over so that you're looking at the back side of the cassette cases. Take 4 of your remaining tapes and stand them up like walls around the outside of your flipped over lid, like you're building a little castle of bad music.
5. Take away two of the walls you've created, leaving a 90 degree angle of cassettes. These remaining two cassette walls will act as a guide for you, as you next need to glue another tape to the underside of the lid (this will keep the lid from sliding around and falling off the box once this thing is finished). So slather the backside of the cassette that you're going to put on the bottom of your lid with glue, then smush it down into the space your walls have kindly laid out for you (those walls... such magnanimous creatures). You'll have a little room for error on the long side of the cassette you're gluing down, but the short side needs to be pretty much flush up against the side wall if you want your finished product to fit together well. Note: If you don't want your finished product to fit together well, please return to step one, duct tape 2 of your cassettes to your nipples, and squeeze half a tube of your plastic glue directly into your mouth. Repeat until rational.
6. Once that's good and glued down, you can go ahead and set your lid aside. Pick out the 2 cassettes that you want to use as the base of your box (good time to use ugly/not interesting ones if you have them), and glue them together just like you did earlier with the two from your lid (you can put them face up or face down, in relation to the rest of the box, it's up to you).
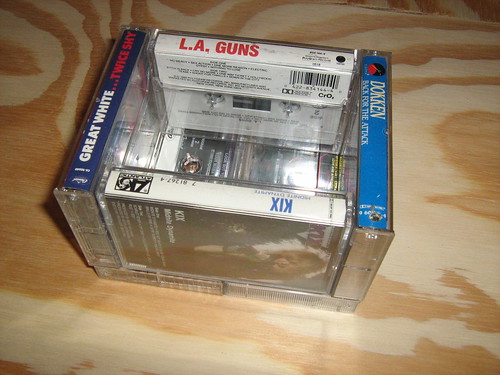
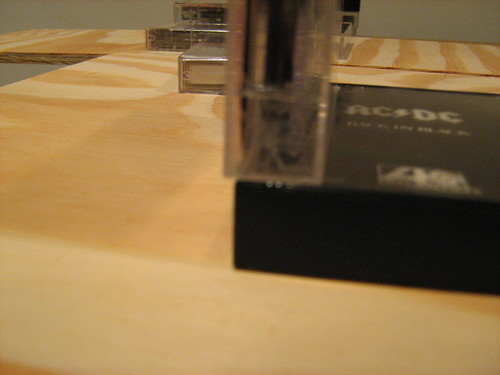
7. You're going to want to do the next few steps fairly quickly, as it helps if you can have your box's walls glued into place before the glue fully hardens (that way you can slide your wall pieces around a little bit to get them exactly where you want them). Put a thin ribbon of glue along one of the full edges (one of the edges that isn't glued together in the middle) of your base, then press a cassette (with its front artwork facing outwards) into place in that spot like so:

8. You'll want for the edge of your wall cassette to be hanging off the base by just the tiniest little bit... about 1/16th of an inch, if you're a units and measures type of person. If you're a visual type of person, look at this madness:
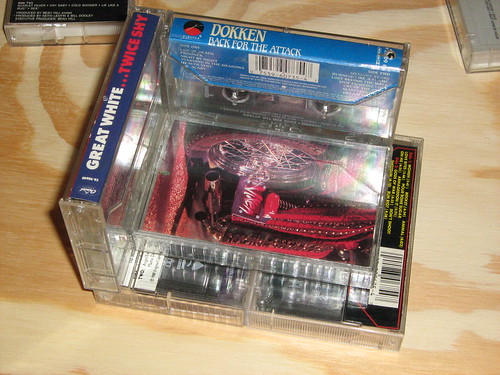
9. Once you have that wall in place, quickly but calmly glue the other 3 side wall cassettes into place along their bases and their vertical edges. If they're slightly asymmetrical, or if one wall is leaning a bit outwards, take this chance to move things into their perfect place before the glue dries.
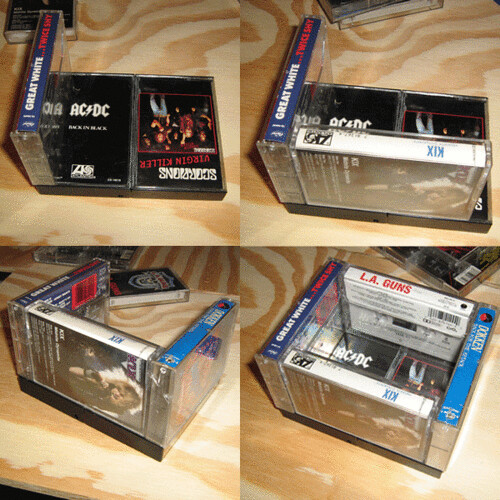
This photo array is evidence of what we in the business call "Enron McHanslaw kicking ass"
10. If you took the 9 cassette route, you're officially done. Just let the glue dry and enjoy the fruit of your labor (I'm not quite sure how one would normally "enjoy" a plastic box, but I'm sure you'll figure something out).
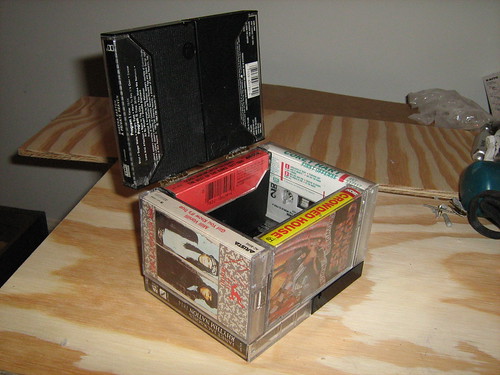
11. (optional) If you want to build a hinged box (which to its credit can hold more stuff inside of it), you'll need to get some 1/2" hinges which should be available at most any hardware store and shouldn't cost more than 3 or 4 dollars for a pack of 4 hinges. With those in hand, wait until the glue has dried on your lid and box structure, then place the lid on top of the box and turn the two onto their side, so that the seam where the hinges are going to be is facing the ceiling. Take some sand paper and scuff up the under side of the hinges as well as the area on your cases that you're going to be adhering the hinges to (be careful with this though, as you don't want to scratch up the cases in areas that aren't going to be covered by the hinges).
12. (still optional) Apply some glue to the scuffed up portions of the cassette cases (I found handling the hinges while they were covered in glue to be a really frustrating activity), then place the hinges in their correct spots and press them down so that they're nearly flush with the lid and the box. Allow this to dry, then take a very small drill bit and drill down through the holes in your hinges. Screw in some very small screws (if you hear the plastic cracking much, take the screw out and widen the hole you drilled with a larger bit), and that's it. Your hinged box, and likely your life's work, is now complete. Congratulations.
That's it, and that's all. Be sure to tune in for my next posting, I'll show you how to turn a disorganized pile of boxes made out of cassettes into a somewhat organized stack of boxes made out of cassettes. Care for a teaser?
Damn, that is one good looking stack. Also, hopefully by next time I'll have learned how to avoid making War and Peace out of my repurposing posts, but I'm thinking that lesson is going to be a tough one for me to come by. Ah well... life goes on, as they say, and so shall my rambling prose. Kudos to me, kudos.


1 comment:
I bet you have a massive thingy.
Post a Comment